


Tampilkan postingan dengan label SIM800L. Tampilkan semua postingan
Tampilkan postingan dengan label SIM800L. Tampilkan semua postingan
Sabtu, 06 Agustus 2016

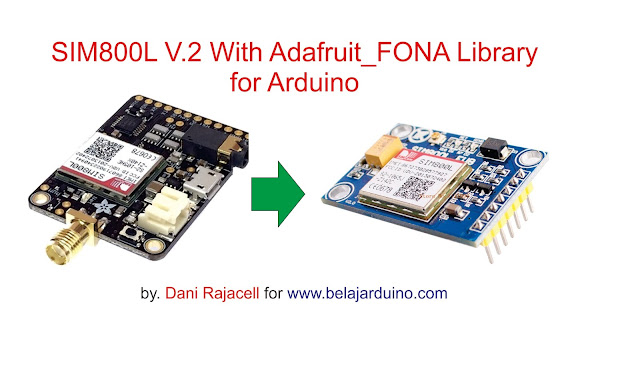
Penggunaan Chip SIMCOM masih sama dengan versi sebelumya.Perbedaan yang mencolok adalah pada Breakout Board dan PIN Interface nya.
Sabtu, 11 Juni 2016

Control Relay 4 Channel Menggunakan SMS
Yang dimaksud disini adalah mengontrol 4 buah beban (misal lampu atau motor ata Home electric device) melalui Relay dan dikendalikan melalui SMS yang sudah ter-Otentikasi Nomor Pengirimnya,artinya Relay hanya mau mengikuti instruksi dari SMS dengan Nomor yang sudah terdaftar di sistem dan mengabaikan Instruksi SMS dari Nomor yang tidak terdaftar pada sistem program.
Kamis, 02 Juni 2016

Yang Dimaksud Filtering Authentication Number adalah Hanya menerima perintah SMS dari Nomor Hp yang sudah terdaftar/kita Set ke dalam sistem.
Apabila ada SMS masuk ke dalam GSM Module Sistem kita maka akan dicek terlebih dahulu oleh Program apakah Nomor Pengirim SMS sudah terdaftar pada sistem (diijinkan control sistem) atau tidak.
baca terlebih dulu : control led / relay dengan perintah SMS
Apabila Nomor Pengirim SMS terverifikasi maka Sistem akan melanjutkan Proses pembacaan perintah pada Content SMS dan meng-Eksekusi isi Perintah
Namun Jika Nomor Pengirim SMS gagal diferifikasi maka Sistem akan menolak perintah/membiarkan SMS / tidak meng-Eksekusi isi perintah pada SMS
Library menggunakan Standar GSM atau menggunakan Seeduino
Disini saya Mencoba Program Menggunakan SIM800L Module
Wiring sebagai berikut :
Wiring SIM800L <--> Arduino Uno
RXD <--> D8
TXD <--> D7
VCC <--> 3.7V melalui stepdown dari 5V Arduino
GND <--> GND
LED Merah (+) ==> D5
LED Biru (+) ==> D6
LED Merah & Biru (-) ==> GND
Berikut adalah Contoh Simple Sketch Filtering Authentication Number
Silahkan dikembangkan lagi
1 2 3 4 5 6 7 8 9 10 11 12 13 14 15 16 17 18 19 20 21 22 23 24 25 26 27 28 29 30 31 32 33 34 35 36 37 38 39 40 41 42 43 44 45 46 47 48 49 50 51 52 53 54 55 56 57 58 59 60 61 62 63 64 65 66 67 68 69 70 71 72 73 74 75 76 77 78 79 80 81 82 83 84 85 86 87 88 89 90 91 92 93 94 95 96 97 98 99 100 101 102 103 104 105 106 107 108 109 110 111 112 113 114 115 116 117 118 119 120 121 122 123 124 125 126 | // **** FILTERING AUTHENTICATION NUMBER BY DANI **** #include <gprs.h> #include <softwareserial.h> #define TIMEOUT 5000 #define LED_PIN 13 #define ON 1 #define OFF 0 const int MERAH = 5; const int BIRU = 6; int StatusMerah; int StatusBIRU; int AuthNumber = 0; GPRS gprs; void setup() { pinMode (MERAH , OUTPUT); pinMode (BIRU , OUTPUT); Serial.begin(9600); while(!Serial); Serial.println("Starting SIM800 Auto Read SMS"); gprs.preInit(); delay(1000); while(0 != gprs.init()) { delay(1000); Serial.print("init error\r\n"); } //Set SMS mode to ASCII if(0 != gprs.sendCmdAndWaitForResp("AT+CMGF=1\r\n", "OK", TIMEOUT)) { ERROR("ERROR:CNMI"); return; } //Start listening to New SMS Message Indications if(0 != gprs.sendCmdAndWaitForResp("AT+CNMI=1,2,0,0,0\r\n", "OK", TIMEOUT)) { ERROR("ERROR:CNMI"); return; } Serial.println("Init success"); } //Variable to hold last line of serial output from SIM800 char currentLine[500] = ""; int currentLineIndex = 0; //Boolean to be set to true if message notificaion was found and next //line of serial output is the actual SMS message content bool nextLineIsMessage = false; void loop() { //Write current status to LED pin digitalWrite(MERAH, StatusMerah); digitalWrite(BIRU, StatusBIRU); //If there is serial output from SIM800 if(gprs.serialSIM800.available()){ char lastCharRead = gprs.serialSIM800.read(); //Read each character from serial output until \r or \n is reached (which denotes end of line) if(lastCharRead == '\r' || lastCharRead == '\n'){ String lastLine = String(currentLine); //If last line read +CMT, New SMS Message Indications was received. //Hence, next line is the message content. if(lastLine.startsWith("+CMT:")){ Serial.println(lastLine); //Authentication Number if(lastLine.indexOf("+6289XXXXXXXX") >= 0){ //Ganti pakai Nomor Hp kamu ya bro AuthNumber = 1; Serial.println("------------------------"); // Keterangan FAILED Authentication Serial.println("Authentication Success.."); Serial.println("------------------------"); nextLineIsMessage = true; } if(AuthNumber == 0){ Serial.println("xxxxxxxxxxxxxxxxxxxxxxx"); // Keterangan SUCCESS Authentication Serial.println("Authentication Failed.."); Serial.println("xxxxxxxxxxxxxxxxxxxxxxx"); } } else if (lastLine.length() > 0) { if(nextLineIsMessage) { Serial.println(lastLine); // ########## MEMBACA KONTEN SMS DAN MENCARI+MENGARTIKAN KONTEN SMS KE PROGRAM ######### //Kendali LED MERAH if(lastLine.indexOf("MERAH ON") >= 0){ StatusMerah = 1; Serial.println("LED MERAH DINYALAKAN");} else if(lastLine.indexOf("MERAH OFF") >= 0) { StatusMerah = 0; Serial.println("LED MERAH DIMATIKAN");} //Kendali LED BIRU if(lastLine.indexOf("BIRU ON") >= 0){ StatusBIRU = 1; Serial.println("LED BIRU DINYALAKAN");} else if(lastLine.indexOf("BIRU OFF") >= 0) { StatusBIRU = 0; Serial.println("LED BIRU DIMATIKAN");} nextLineIsMessage = false; AuthNumber = 0; // Mengembalikan Status AuthNumber Untuk SMS berikutnya } } //Clear char array for next line of read for( int i = 0; i < sizeof(currentLine); ++i ) { currentLine[i] = (char)0; } currentLineIndex = 0; } else { currentLine[currentLineIndex++] = lastCharRead; } } } |
Berikut Hasil Testing menggunakan Serial Monitor dengan 2 kali kirim SMS dengan Nomor yang berbeda (1 terdaftar dan 1 tidak terdaftar)

Terimakasih Sudah Mampir......
Semoga Bermanfaat...........
Menggunakan SMS Untuk Control LED / Relay via Module SIM800L

Disini saya akan memberikan Contoh Sketch Sederhana untuk Mengontrol LED/Relay melaui SMS yang dikirim dari ponsel anda ke Module SIM800L yang terpasang pada Arduino.
Selasa, 31 Mei 2016

Ada beberapa type dari Breakout Board SIM800/SIM800L yang akan kita bahas disini adalah yg Versi
Mini SIM800L dengan Micro SIM.
Berikut datasheet SIM800L mini Module :
Description:
Chip: SIM800L
Voltage: 3.7-4.2V (datasheet = 3.4-4.4V)
Freq : QuadBand 850/900/1800/1900Mhz
Module size: 2.5cmx2.3cm
Transmitting power
Class 4 (2W) at GSM 850 and EGSM 900
Class 1 (1W) at DCS 1800 and PCS 1900GPRS connectivity
GPRS multi-slot class 12 default
GPRS multi-slot class 1~12 (option)
Temperature range Normal operation: 40°C ~ +85°C
TTL serial port for serial port, you can link directly to the microcontroller. No need MAX232
Power module automatically boot, homing network
Onboard signal lights all the way . It flashes slowly when there is a signal, it flashes quickly when there is no signal
Full Datasheet silahkan download link berikut :
Datasheets Lengkap Module SIM800L (Google Drive/Dani)


Module SIM800L memiliki 12 pin Header,6 di sisi kanan dan 6 disisi kiri,berikut definisi PIN nya
1.NET = Antena
2.VCC = +3.7-4.2V
3.RST = Reset
4.RXD = Rx Data Serial
5.TXD = Tx Data Serial
6.GND = Ground/0V
7.RING when call incoming
8.DTR
9.MICP = Microphone +
10.MICN = Microphone -
11.SPKP = Speaker +
12.SPKN = Speaker -

Default Boudrate untuk Module SIM800L adalah 9600
Harus Menggunakan Step Down Converter jika akan dihubungkan dengan VCC 5V Arduino
Saya mencoba memberi tegangan VCC SIM800L dengan 4,2VDC (saya turunkan dari 5V vcc Arduino menggunakan Stepdown Buck Converter) dan Hasilnya Muncul Warning Over Voltage pada Serial Monitor.Saya turunkan tegangan sampai 4,15V Warning masih Muncul.

Saya turunkan Kembali tegangan VCC SIM sampai 3,7VDC dan baru bisa Berjalan Normal walaupun pada Datasheets nya disebutkan VCC 3.4-4.4VDC
Untuk Koneksi Standar Wiring Module SIM800L dengan Arduino adalah sbb:
Sim800L <--> Arduino
VCC <--> 3,7V melalui Step Down dari 5V Arduino
GND <--> GND
RXD <--> Tx Serial D1 atau Tx SoftwareSerial
TXD <--> Rx Serial D0 atau Rx SoftwareSerial
Berikut Adalah Coding Untuk Testing Koneksi SIM800L ke Arduino Melalui SoftwareSerial
1 2 3 4 5 6 7 8 9 10 11 12 13 14 15 16 17 18 19 20 21 22 23 24 25 26 27 28 29 30 31 32 33 34 | #include <SoftwareSerial.h> SoftwareSerial SIM800L(2, 3); // RX | TX // Connect the SIM800L TX to Arduino pin 2 RX. // Connect the SIM800L RX to Arduino pin 3 TX. char c = ' '; void setup() { // start th serial communication with the host computer Serial.begin(9600); while(!Serial); Serial.println("Arduino with SIM800L is ready"); // start communication with the SIM800L in 9600 SIM800L.begin(9600); Serial.println("SIM800L started at 9600"); delay(1000); Serial.println("Setup Complete! SIM800L is Ready!"); } void loop() { // Keep reading from SIM800 and send to Arduino Serial Monitor if (SIM800L.available()) { c = SIM800L.read(); Serial.write(c);} // Keep reading from Arduino Serial Monitor and send to SIM800L if (Serial.available()) { c = Serial.read(); SIM800L.write(c); } } |
#Hubungkan TXD SIM800L ke pin D2 Arduino (Rx SoftSerial) dan RXD SIM800L ke D3 (Tx SoftSerial).Buka Serial Monitor pada Arduino IDE dan Setting Boudrate 9600 - Both NL & CR.
#Pastikan SIM800L sudah dimasukan SIM (microSIM) dan LED Indicator Berkedip Lambat (jika kedipnya Cepat berarti SIM No Signal atau SIM Not Detected)
#Tes Koneksi dengan mengetik at
Kalau koneksi berhasil maka SIM800L akan merespon seperti Gambar di bawah :

AT – is to check if interface is working fine.
AT+CFUN – is used to set phone functionality
AT+CFUN? – returns currently set value for AT+CFUN
AT+CFUN=? – returns all possible values that can be set for AT+CFUN (similar to help)
AT+CFUN=1 – is to sent AT+CFUN to 1 (full functionality)
AT+CREG? – to get network registration information. stat=1 means you are registered with home network
AT+COPS? – returns currently registered operator details
AT+COPS=? – returns all the operators available

Mengirim SMS Sim800L melalui SoftwareSerial tanpa menggunakan Library (hanya AT Command)
Berikut adalah Sample Coding Untuk Kirim SMS SIM800L menggunakan SoftwareSerial/tanpa Library1 2 3 4 5 6 7 8 9 10 11 12 13 14 15 16 17 18 19 20 21 22 23 24 25 26 27 28 29 30 31 32 33 34 35 36 37 38 39 | #include <SoftwareSerial.h> SoftwareSerial SIM800L(2, 3); // RX | TX // Connect the SIM800L TX to Arduino pin 2 RX. // Connect the SIM800L RX to Arduino pin 3 TX. void setup() { // start th serial communication with the host computer Serial.begin(9600); while(!Serial); Serial.println("Arduino with SIM800L is ready"); // start communication with the SIM800L in 9600 SIM800L.begin(9600); Serial.println("SIM800L started at 9600"); delay(1000); Serial.println("Setup Complete! SIM800L is Ready!"); Serial.println("Set format SMS ke ASCII"); SIM800L.write("AT+CMGF=1\r\n"); delay(1000); Serial.println("SIM800L Set SMS ke Nomor Tujuan"); SIM800L.write("AT+CMGS=\"089666699999\"\r\n"); delay(1000); Serial.println("SIM800L Send SMS content"); SIM800L.write("Testing Kirim SMS via SIM800L"); delay(1000); Serial.println("Mengirim Char Ctrl+Z / ESC untuk keluar dari menu SMS"); SIM800L.write((char)26); delay(1000); Serial.println("SMS Selesai Dikirim!"); } void loop() { // put your main code here, to run repeatedly: } |
Berikut Screenshoot pada Serial Monitor Arduino IDE

Berikut ScreenShoot SMS MAsuk pada Hp Nomor Tujuan :

Menggunakan GSM Library ke Module SIM800L
Disini saya menggunakan Library dari Seeeduino.Silahkan download librarynya disiniLibrary Seeduino Menggunakan Software Serial dengan Pin Tx=D8 dan Rx=D7
Berikut sambungan wiring antara SIM800L dengan Arduino dengan Library Seeeduino
Sim800L <--> Arduino
VCC <--> 3,7V melalui Step Down dari 5V Arduino
GND <--> GND
RXD <--> D8
TXD <--> D7
Berikut Contoh Sketch kirim SMS dengan SIM800L menggunakan library Seeeduino
1 2 3 4 5 6 7 8 9 10 11 12 13 14 15 16 17 18 19 20 21 22 23 24 25 26 27 28 29 30 31 32 33 34 35 36 37 38 39 40 | /* Sketch: GPRS Connect TCP Function: This sketch is used to test seeeduino GPRS's send SMS func.to make it work, you should insert SIM card to Seeeduino GPRS and replace the phoneNumber,enjoy it! ************************************************************************************ note: the following pins has been used and should not be used for other purposes. pin 8 // tx pin pin 7 // rx pin pin 9 // power key pin pin 12 // power status pin ************************************************************************************ created on 2013/12/5, version: 0.1 by lawliet.zou(lawliet.zou@gmail.com) */ #include <gprs.h> #include <SoftwareSerial.h> GPRS gprs; void setup() { Serial.begin(9600); while(!Serial); Serial.println("SIM800L Demo Send SMS via Seeeduino"); gprs.preInit(); delay(1000); while(0 != gprs.init()) { delay(1000); Serial.print("init error\r\n"); //pesan di Serial Monitor jika proses init module GPRS Gagal } Serial.println("Init succes..."); //pesan di Serial Monitor jika proses init module GPRS Sukses delay(1000); //Format Coding Kirim SMS gprs.sendSMS("089666699999","Test Send SMS with Seeeduino Lib"); //define phone number and text } void loop() { //nothing to do } |
Screenshoot pada layar Hp :

1 2 3 4 5 6 7 8 9 10 11 12 13 14 15 16 17 18 19 20 21 22 23 24 25 26 27 28 29 30 31 32 33 34 35 36 37 38 39 40 | /* Sketch: GPRS Connect TCP Function: This sketch is used to test seeeduino GPRS's send SMS func.to make it work, you should insert SIM card to Seeeduino GPRS and replace the phoneNumber,enjoy it! ************************************************************************************ note: the following pins has been used and should not be used for other purposes. pin 8 // tx pin pin 7 // rx pin pin 9 // power key pin pin 12 // power status pin ************************************************************************************ created on 2013/12/5, version: 0.1 by lawliet.zou(lawliet.zou@gmail.com) */ #include <gprs.h> #include <SoftwareSerial.h> GPRS gprs; void setup() { Serial.begin(9600); while(!Serial); Serial.println("SIM800L Demo Calling via Seeeduino"); gprs.preInit(); delay(1000); while(0 != gprs.init()) { delay(1000); Serial.print("init error\r\n"); //pesan di Serial Monitor jika proses init module GPRS Gagal } Serial.println("Init succes..."); //pesan di Serial Monitor jika proses init module GPRS Sukses delay(1000); //Format Coding Calling Number gprs.callUp("089666699999"); //define phone number } void loop() { //nothing to do } |
Screenshoot di layar Hp :

Auto Read Incoming SMS From SIM800L to Arduino Serial Monitor
Berikut Contoh Sketch Auto Read incoming SMS dengan SIM800L menggunakan library Seeeduino
1 2 3 4 5 6 7 8 9 10 11 12 13 14 15 16 17 18 19 20 21 22 23 24 25 26 27 28 29 30 31 32 33 34 35 36 37 38 39 40 41 42 43 44 45 46 47 48 49 50 51 52 53 54 55 56 57 58 59 60 61 62 63 64 65 66 67 68 69 70 71 72 73 74 75 76 77 78 79 80 81 82 83 84 85 86 87 88 89 90 | #include <gprs.h> #include <softwareserial.h> #define TIMEOUT 5000 #define LED_PIN 13 bool ledStatus; GPRS gprs; void setup() { Serial.begin(9600); while(!Serial); Serial.println("Starting SIM800 Auto Read SMS"); gprs.preInit(); delay(1000); while(0 != gprs.init()) { delay(1000); Serial.print("init error\r\n"); } //Set SMS mode to ASCII if(0 != gprs.sendCmdAndWaitForResp("AT+CMGF=1\r\n", "OK", TIMEOUT)) { ERROR("ERROR:CNMI"); return; } //Start listening to New SMS Message Indications if(0 != gprs.sendCmdAndWaitForResp("AT+CNMI=1,2,0,0,0\r\n", "OK", TIMEOUT)) { ERROR("ERROR:CNMI"); return; } Serial.println("Init success"); } //Variable to hold last line of serial output from SIM800 char currentLine[500] = ""; int currentLineIndex = 0; //Boolean to be set to true if message notificaion was found and next //line of serial output is the actual SMS message content bool nextLineIsMessage = false; void loop() { //Write current status to LED pin digitalWrite(LED_PIN, ledStatus); //If there is serial output from SIM800 if(gprs.serialSIM800.available()){ char lastCharRead = gprs.serialSIM800.read(); //Read each character from serial output until \r or \n is reached (which denotes end of line) if(lastCharRead == '\r' || lastCharRead == '\n'){ String lastLine = String(currentLine); //If last line read +CMT, New SMS Message Indications was received. //Hence, next line is the message content. if(lastLine.startsWith("+CMT:")){ Serial.println(lastLine); nextLineIsMessage = true; } else if (lastLine.length() > 0) { if(nextLineIsMessage) { Serial.println(lastLine); //Read message content and set status according to SMS content if(lastLine.indexOf("LED ON") >= 0){ ledStatus = 1; } else if(lastLine.indexOf("LED OFF") >= 0) { ledStatus = 0; } nextLineIsMessage = false; } } //Clear char array for next line of read for( int i = 0; i < sizeof(currentLine); ++i ) { currentLine[i] = (char)0; } currentLineIndex = 0; } else { currentLine[currentLineIndex++] = lastCharRead; } } } |
Screenshoot pada Serial Monitor Arduino dan Pengiriman SMS dr Hp :


Auto Answer Incoming Call From SIM800L with Notify Arduino Serial Monitor
Berikut Contoh Sketch Auto Answer Incoming Call dengan SIM800L menggunakan library Seeeduino
1 2 3 4 5 6 7 8 9 10 11 12 13 14 15 16 17 18 19 20 21 22 23 24 25 26 27 28 29 30 31 32 33 34 35 36 37 38 39 40 41 42 43 44 45 46 47 | #include <gprs.h> #include <SoftwareSerial.h> char gprsBuffer[64]; int i = 0; char *s = NULL; int inComing = 0; GPRS gprs; void setup() { // put your setup code here, to run once: Serial.begin(9600); while(!Serial); Serial.println("GPRS - Auto Answer incoming Call..."); gprs.preInit();//power on SIM800 delay(1000); while(0 !=gprs.init()) { //gprs init delay(1000); Serial.print("init error\r\n"); } Serial.println("Init success, start to monitor your incoming Call..."); } void loop() { // put your main code here, to run repeatedly: if(gprs.serialSIM800.available()) { inComing = 1;} else{delay(100);} if(inComing){ gprs.readBuffer(gprsBuffer,32,DEFAULT_TIMEOUT); Serial.println(gprsBuffer); Serial.println("Panggilan Masuk"); //Auto Answer Call Incoming if(NULL != strstr(gprsBuffer,"RING")) { delay (500); // Delay Angkat Telefon gprs.answer();} if(NULL != strstr(gprsBuffer,"OK")) { Serial.println("Panggilan Diterima");} if(NULL != strstr(gprsBuffer,"NO CARRIER")) { Serial.println("Panggilan Terputus");} gprs.cleanBuffer(gprsBuffer,32); inComing = 0; } } |
Berikut Tampilan Layar Serial Monitor Arduino :

Setting Caller ID (nomor panggilan masuk) pada SIM800L menggunakan interaksi Serial Monitor
1 2 3 4 5 6 7 8 9 10 11 12 13 14 15 16 17 18 19 20 21 22 23 24 25 26 27 28 29 30 31 32 33 34 35 36 37 38 39 40 41 42 43 44 45 46 47 48 49 50 51 52 53 54 55 56 57 58 59 60 61 62 | #include <gprs.h> #include <SoftwareSerial.h> char gprsBuffer[64]; int i = 0; char *s = NULL; int inComing = 0; char c; GPRS gprs; void setup() { // put your setup code here, to run once: Serial.begin(9600); while(!Serial); Serial.println("GPRS - Auto Answer incoming Call..."); gprs.preInit();//power on SIM800 delay(1000); while(0 !=gprs.init()) { //gprs init delay(1000); Serial.print("init error\r\n"); } Serial.println("Init success, start to monitor your incoming Call..."); delay (1000); Serial.println("Aktifkan Caller ID ? Y=Ya T=Tidak"); } void loop() { if(Serial.available()) { c = Serial.read(); if (c=='Y'){ Serial.println("Ya"); gprs.serialSIM800.print("AT+CLIP=1\r"); Serial.println("Caller ID diperlihatkan!");} if (c=='T'){ Serial.println("Tidak"); gprs.serialSIM800.print("AT+CLIP=0\r"); Serial.println("Caller ID disembunyikan!");} } // put your main code here, to run repeatedly: if(gprs.serialSIM800.available()) { inComing = 1;} else{delay(100);} if(inComing){ gprs.readBuffer(gprsBuffer,32,DEFAULT_TIMEOUT); Serial.println(gprsBuffer); Serial.println("Panggilan Masuk"); //Auto Answer Call Incoming if(NULL != strstr(gprsBuffer,"RING")) { delay (500); // Delay Angkat Telefon gprs.answer();} if(NULL != strstr(gprsBuffer,"OK")) { Serial.println("Panggilan Diterima");} if(NULL != strstr(gprsBuffer,"NO CARRIER")) { Serial.println("Panggilan Terputus");} gprs.cleanBuffer(gprsBuffer,32); inComing = 0; } } |
Ketik Huruf "Y" pada Serial Monitor Untuk Mengaktifkan Fitur Caller ID


Jika Ingin Menyembunyikan Caller ID maka ketik Huruf "T" pada serial Monitor dan Fitur Caller ID akan dinonaktifkan (default) dan Caller ID telefon masuk tidak akan ditampilkan